
Install Wireshark 3.0.1 on Ubuntu 18.04

(UPDATE 20190619: There are better instructions in a new post I made. Go there. Wireshark is actually built correctly and will even capture packets (unlike these instructions)).

(UPDATE 20190611: This method below is a bit clunky and causes quite a few issues that are unnecessary. I’ve found a new method that I’m going to make a new post for. Hint: in the Wireshark tarball, look at the ‘INSTALL’ file.)

If you’re doing packet analysis and run Debian/Ubuntu, you may have noticed that Wireshark is currently at version 3.0.2 (at the time of writing this), but both Debian and Ubuntu are running 2.6.x versions of Wireshark (Debian Stretch is at 2.6.7-1, and Ubuntu 18.04 is at 2.6.8-1). While Fedora 30 is running Wireshark 3.0.1, even Ubuntu 19.10 (Eoan) is still running Wireshark 2.6.9-1 (again at the time of writing this).

Wireshark Logo

Now for probably really good reasons, there still isn’t a Wireshark 3.0.1 deb package for Debian-Ubuntu distributions, and if you just so happen to be at Sharkfest 2019 running some flavor of Debian/Ubuntu and you’re taking the packet analysis classes, you need to be running Wireshark 3.0.1. Of course, you could just fire up a VM on your laptop and run Windows, or grab that random spare Mac in your bag — why you have a spare Mac in your bag is beyond me — but your only option is to compile from source the Wireshark package.

I’m going to quit yapping about this now and just get to the point.

Compiling and Installing Wireshark 3.0.1 for Ubuntu 18.04

First off, Wireshark is a complicated application, and I am not a developer, so my instructions here are likely flawed. My main intent here is to just share the dependencies needed to get Wireshark 3.0.1 compiled because otherwise you’re going to be running the ninja/make commands, get the dependency error message, Google the dependency package for Ubuntu, install it, then find the next one over and over again — if only someone just posted the dependencies!

That being said, I work with Ubuntu LTS releases, so my instructions here are what I put together for Ubuntu 18.04 on a Ubuntu 18.04 laptop and in a Linux container in Crostini (this is the ‘Linux Apps’ service on Chromebooks, which is my primary device as of late and is a whole other post I hope to do some day).

These instructions are largely lifted from this post on ‘Beyond Linux from Scratch’, but I’ve appened them with dependency information for Ubuntu 18.04.

Another caveat here is that I previously had done an ‘apt install wireshark’, which helped with most of the libpcap depdencies. Ubuntu runs libpcap0.8 1.8.1-6*, but the ‘Beyond Linux’ post says it needs libpcap-1.9 (my install seems to capture fine with 0.8 1.8, but I’m not really capturing with this install, just analyzing).

Lastly, this doesn’t have option components. I’m just trying to get 3.0.1 up and running for the basics.

If there ways to improve this, please comment and let me know!

Install the dependencies

First off, let’s get the dependencies installed:

sudo apt install build-essential pkg-config ninja-build bison flex qt5-default qttools5-dev-tools qtcreator ninja-build libpcap-dev cmake libglib2.0-dev libgcrypt20-dev qttools5-dev qtmultimedia5-dev libqt5svg5-dev

Create the Wireshark Group and Add Yourself to the Group

To capture without running as root, create the ‘wireshark’ group (assuming gid 62 isn’t taken). Run the following as root/sudo:

groupadd -g 62 wireshark

Add yourself to the group (you’ll need to log out and back in for the change to go into effect) as root/sudo:

usermod -a -G wireshark <username>

Grab and Extract the Wireshark tarball

Grab the Wireshark tarball:

wget https://www.wireshark.org/download/src/all-versions/wireshark-3.0.1.tar.xz

Extract it and move into the directory:

tar xf wireshark-3.0.1.tar.xz
cd wireshark-3.0.1

Build the Wireshark Application

In the ‘wireshark-3.0.1’ directory, build the application for install:

mkdir build &&
cd build &&

cmake -DCMAKE_INSTALL_PREFIX=/usr \
-DCMAKE_BUILD_TYPE=Release \
-DCMAKE_INSTALL_DOCDIR=/usr/share/doc/wireshark-3.0.1 \
-G Ninja \
.. &&
ninja

Install the Built Wireshark Application

Now as root, install Wireshark:

ninja install &&

install -v -m755 -d /usr/share/doc/wireshark-3.0.1 &&
install -v -m644 ../README.linux ../doc/README.* ../doc/{*.pod,randpkt.txt} \
/usr/share/doc/wireshark-3.0.1 &&

pushd /usr/share/doc/wireshark-3.0.1 &&
for FILENAME in ../../wireshark/*.html; do
ln -s -v -f $FILENAME .
done &&
popd
unset FILENAME

Secure the Application Directories

Set ownership info of the applications:

chown -v root:wireshark /usr/bin/{tshark,dumpcap} &&
chmod -v 6550 /usr/bin/{tshark,dumpcap}

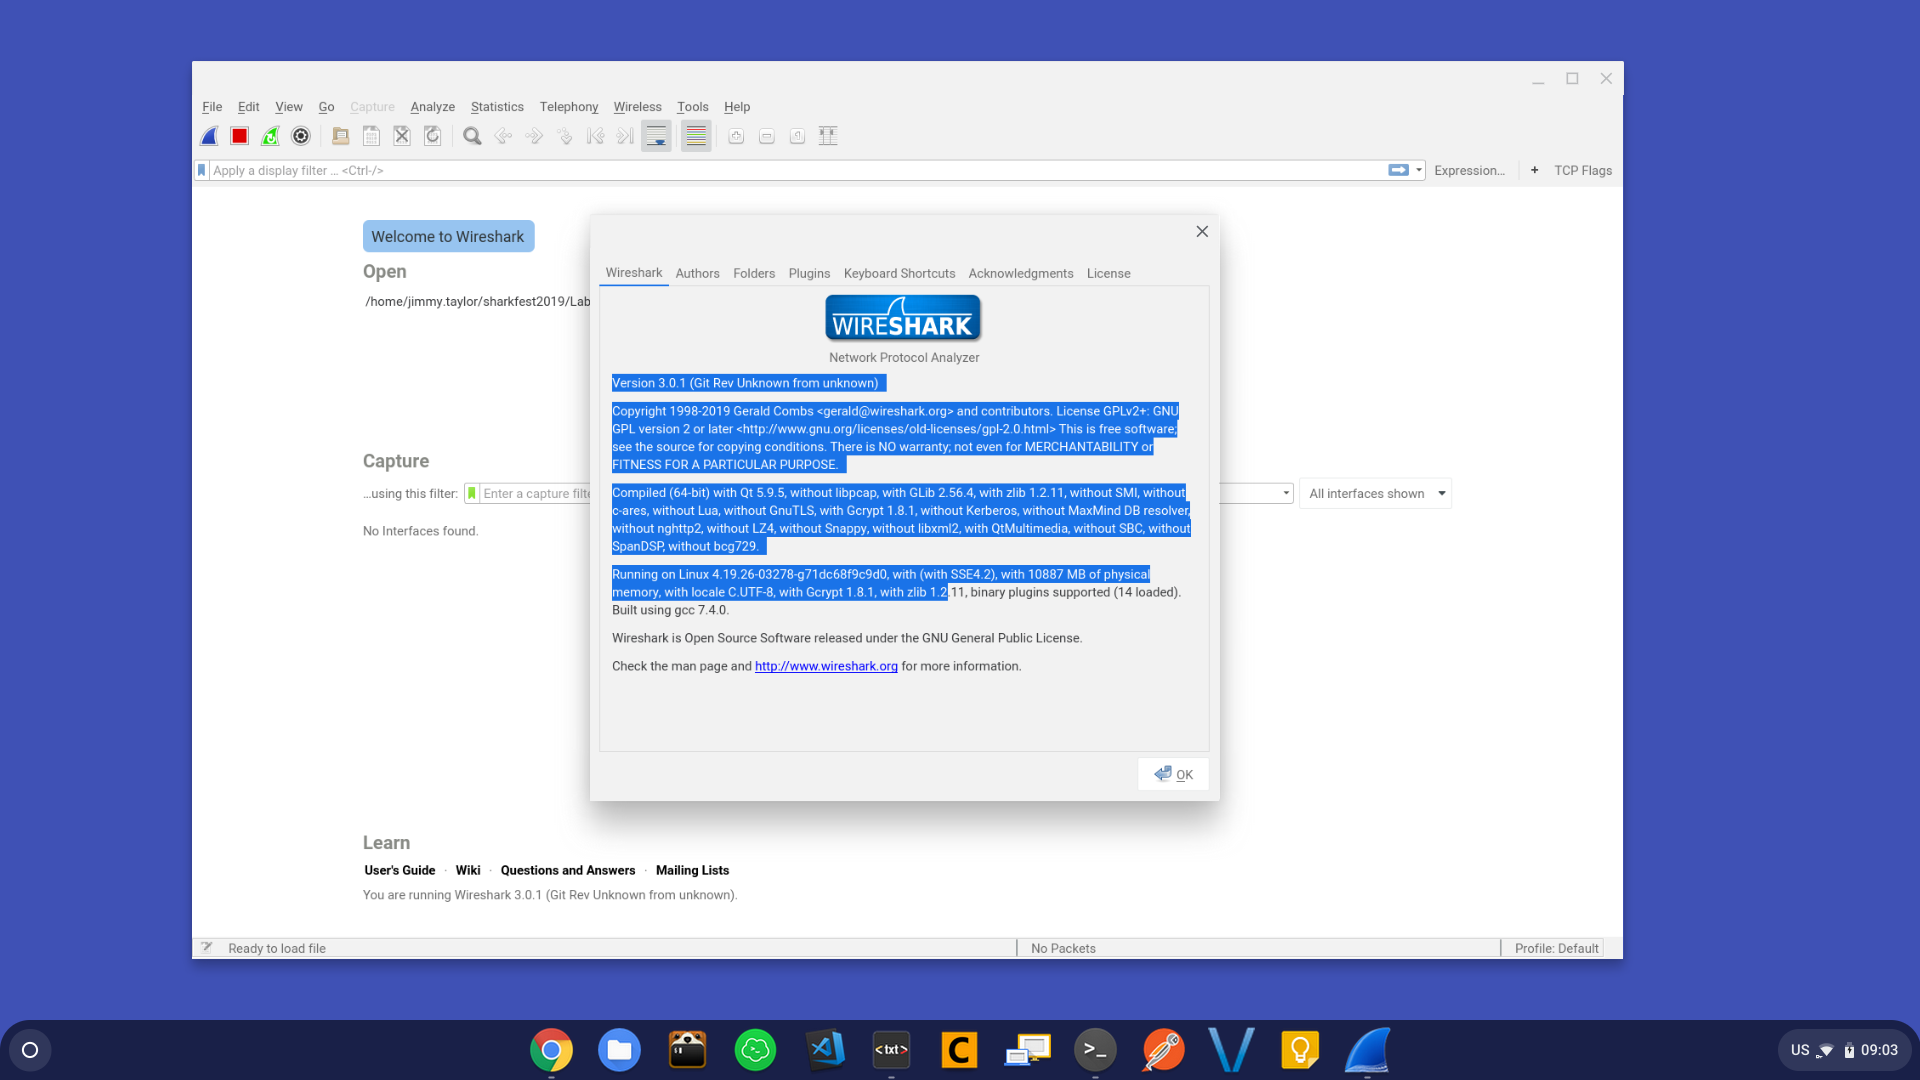
That should be it! Run ‘wireshark’ and you should be set. Should look something like this:

Wireshark 3.0.1 on ChromeOS
Wireshark 3.0.1 on Ubuntu 18.04.2 Containerized App – ChromeOS

Bugs I’ve Encountered

Seems that on the Crostini build, some things aren’t working correctly. I’ve built this on my Ubuntu 18.04 laptop with no issues (yet). Some that I’ve found on Crostini:

  • Interfaces not found for capturing: I’m not really concerned about this because I knew from the get-go that Wireshark with ChromeOS would be spotty, especially with Wireshark. However, if you use the official Ubuntu package, packet capture works fine (although because it’s containerized, you don’t get hardware access for capturing).
  • No statistic information on interface: another one I don’t care about because I get the data elsewhere (see below).

No packets message

Edit (20190610): I erroneously said that Ubuntu runs libpcap0.8, inferring that the version was 0.8, but Ubuntu actually runs 1.8.1-6. The Ubuntu libpcap package is called 0.8 and is built and tested for Ubuntu, but that name doesn’t actually reflect the actual version.

Juniper Lessons Learned Compilation

My experience with Juniper Networks and JunOS was never too deep, especially since I was trained in the Cisco world. Working for a VAR that sold Juniper gear and offered system services, I was a system engineer that knew enough about Juniper gear to get servers connected and off to the races. Fast-forward a few years, and being bored with system engineering/administration at my organization, an opportunity came up because of my Juniper experience to join the network engineering team and I grabbed onto it.JUNOSThis post is just a quick compilation of things I’ve learned about JunOS that I thought I’d share, be it good, bad, or maybe even ugly. Some of these things you can learn from the ‘Day One’ books, but I feel like some things just aren’t that clear for whatever reason.

Showing Juniper Configuration As Commands

Coming from the Cisco IOS command line world, I was always a little annoyed with the configuration of Juniper because it was in a dictionary/JSON type of format. I mean, it’s great for reading and breaking down configurations into a structured data format, but it always felt a little inefficient on display space, and if you need to make a quick change to copy-edit-paste the configuration, it’s a little bit of a pain.

Then I learned about the ‘display’ command, which opened up a few doors.

Typical Juniper configurations look something like this:

interfaces {
    ge-0/0/0 {
        unit 0 {
            family ethernet-switching {
                interface-mode access;
                vlan {
                    members 60;
                }
            }
        }
    }
}

However, you can get your configuration as commands with by piping your ‘show config’ command to ‘display set’, like this:

show configuration | display set

Which gives you the above configuration like this:

set interfaces ge-0/0/0 unit 0 family ethernet-switching interface-mode access
set interfaces ge-0/0/0 unit 0 family ethernet-switching vlan members 60

You can then show all the interfaces, make a quick copy-edit-paste change, and be done. Personally, I like this better then the ‘load merge|replace|set terminal” method, but that’s just me.

Even cooler about this is that when you do this, you can pipe your ‘show config’ command to ‘display set’ and then to your ‘match “0/0/0″‘ statement to find the configuration you’re looking for and identify the stanza it’s in. Something like this:

show configuration | display set | match "0/0/0"

Which, in the above example, which show you all configurations that include “0/0/0” in it, like this:

set interfaces ge-0/0/0 unit 0 family ethernet-switching interface-mode access
set interfaces ge-0/0/0 unit 0 family ethernet-switching vlan members 60
set switch-options voip interface ge-0/0/0.0 vlan PHONES
set switch-options voip interface ge-0/0/0.0 forwarding-class expedited-forwarding

The other thing about the display command is that it also has a bunch of cool output formats that I think are interesting to look at (‘display detail’ sure is interesting, and ‘json’ or ‘xml’ sure is helpful).

Juniper Wildcard Ranges for Configurations

When you’re in edit mode and you’ve just come from the Cisco world, you’re probably wondering where the heck the ‘interface range’ command is. If you’re like me, you started using ‘interface-range’ statements and just assumed JunOS is just quirky and resigned to not having range commands.

Well, you’re in luck if you’re reading this because JunOS does have the same feature and the command is ‘wildcard range’.

In Cisco, you may be used to doing something like this:

int range g1/0/1-2,g1/0/4,g1/0/6

With Juniper, it’s like this:

wildcard range set interfaces ge-0/0/[1-2,4,6]

Commit Sync By Default on Virtual Chassis’d Systems

This is a small one, but I thought it was worth sharing. One thing on any virtual chassis’d switches/routers that you want to remember to do is a ‘commit synchronize’ when you’re committing configurations. However, I’d prefer to not have to type ‘sync’ and just be done with it so I can ‘commit and-quit’ super quick. The solution is simple; run/add this to your config:

set system commit synchronize

Do one last ‘commit sync’ and then this is done automatically.

Juniper Has Rapid-PVST Interoperability

One of the issues my org has dealt with at our Juniper-deployed networks is that our Cisco routers completely block the VLANs for downstream ports when a loop is detected. Almost always it’s that a user has plugged their phone into two ports on the network, and since spanning tree was only set to the default configuration (RSTP) on our Juniper gear, these outages were somewhat frequent.

After doing some research and testing, I found out that Juniper has developed a protocol for rapid-pvst interoperability called ‘VSTP’. I’m still developing and ironing-out the details about our configuration, but here’s the base configuration we’ve done.

protocols {
    vstp {
        interface all {
            bpdu-timeout-action {
                block;
            }
        }
        vlan all;
    }
}

Of note, I’ve deleted RSTP because I don’t know the ramifications of keeping it in there (which Juniper notes is supported).

Also of note, if you choose to configure each interface individually instead of ‘interface all’, VSTP has an interface configuration limit of just over 300 ports (I found this out the hard way while trying to configure a 8-count virtual chassis stack). Juniper notes this somewhere in it’s documentation, but they don’t give the exact number and they just vaguely say there’s a limit because of processing load.

I plan on fleshing what I’ve learned with Juniper spanning tree in a future post.

No-More Using That Spacebar

Finally, here’s a super quick one. If you run a ‘show config’ and just need it to print out the configuration before a software update, pipe the command to ‘no-more’ and it will print out the entire configuration, much like setting your terminal length to 0. Command:

show configuration | no-more

Final Thoughts

Don’t really have much else to say other than I’ve come to appreciate JunOS a lot more than when I originally learned it. Overall, I think learning Juniper has made me a better engineer because I’ve had to think about network configuration and protocols in a broader sense, much like how learning Linux made me a better Windows administrator.

From my initial experience going down the Python networking development road, Juniper certainly is easier to work with than screen-scraping with Cisco. NAPALM is certainly my tool of choice as of right now.

SNMP with Juniper, however, leaves something to be desired. For example I added MIBs and configured some sensors in PRTG, but I get weird issues with interfaces such as getting their ‘logical’ interfaces in the form of something like ‘0/0/0.0’, but missing the interfaces that actually work in the form of ‘0/0/0’.

Lastly, what I’ve learned working between Cisco and Juniper is that I just don’t think Cisco has any special sauce with access switching anymore. As a result, what Cisco (and Juniper and others) are doing is selling you a platform instead of just hardware now. You have to buy into a giant platform narrative instead of just letting hardware compete with other hardware.

Kirk Byers Python for Network Engineers Videos

Over the last three months I’ve been transitioning back over to network engineering. When I first started working in IT, my role was as a network technician, but slowly I took on more and more systems administration and engineering, and the work I was doing was mostly with PowerShell.

As a result, my Python skills have atrophied over the years since I was so focused on PowerShell, and if there’s one thing I’ve learned while being put in charge of managing thousands of switches, it’s that I need some scripting in place to handle mass changes.


Python Logo

The perfect class to get myself back in the Python game was from reddit, offered by Kirk Byers called “Python for Network Engineers“. It’s a introductory course on some Python basics, which for offered enough to get me going again.

I’m putting this list of the videos online for myself since I hate referencing my emails all the time, but if someone else finds it useful, awesome.

Lesson 1: Why Python, the Shell, and Strings
Lesson 2: Numbers, Files, Lists, and Linters
Lesson 3: Conditionals and Loops
Lesson 4: Dictionaries, Exceptions, and Regular Expressions
Lesson 5: Functions and the Python Debugger
Lesson 6: Netmiko
Lesson 7: Jinja2, YAML and JSON
Lesson 8: Libraries, PIP, and Virtual Environments

Lesson 1: Why Python, the Shell, and Strings

  1. Introduction 
    Video https://vimeo.com/243034300
    Length is 7 minutes
  2. Why Learn Programing?
    Video https://vimeo.com/243905715
    Length is 1 minute
  3. Why Python?
    Video https://vimeo.com/243909371
    Length is 3 minutes
  4. Python2 versus Python3
    Video https://vimeo.com/243912631
    Length is 2 minutes
  5. Characteristics of Python
    Video https://vimeo.com/243918300
    Length is 5 minutes
  6. The Python Interpreter Shell
    Video https://vimeo.com/242411259
    Length is 9 minutes
  7. IPython
    Video https://vimeo.com/242460561
    Length is 4 minutes
  8. Printing to stdout and Reading from stdin
    Video https://vimeo.com/243028886
    Length is 6 minutes
  9. Dir, Help, and Variables
    Video https://vimeo.com/243480156
    Length is 10 minutes
  10. Python Strings (Part 1)
    Video https://vimeo.com/243481392
    Length is 6 minutes
  11. Python Strings (Part 2)
    Video https://vimeo.com/243482081
    Length is 8 minutes
  12. Python Strings (Part 3)
    Video https://vimeo.com/243482871
    Length is 10 minutes
  13. Python String Formatting (Part 1)
    Video https://vimeo.com/243936489
    Length is 12 minutes
  14. Python String Formatting (Part 2)
    Video https://vimeo.com/243956669
    Length is 4 minutes

Lesson 2: Numbers, Files, Lists, and Linters

  1. Numbers
    Video https://vimeo.com/244128549
    Length is 9 minutes
  2. Files
    Video https://vimeo.com/244127459
    Length is 10 minutes
  3. Lists
    Video https://vimeo.com/244257596
    Length is 6 minutes
  4. List Slices
    Video https://vimeo.com/244259492
    Length is 4 minutes
  5. Lists are Mutable
    Video https://vimeo.com/244287000
    Length is 5 minutes
  6. Tuples
    Video https://vimeo.com/244153105
    Length is 3 minutes
  7. Using .join()
    ​Video https://vimeo.com/245464488
    Length is 3 minutes
  8. sys.argv
    Video https://vimeo.com/245464766
    Length is 2 minutes
  9. Linters
    Video https://vimeo.com/245102246
    Length is 6 minutes

Lesson 3: Conditionals and Loops

  1. Conditionals
    Video https://vimeo.com/245104620
    Length is 8 minutes
  2. Boolean Logic (Booleans, Ternary Operator, None)
    Video https://vimeo.com/245112558
    Length is 8 minutes
  3. Python For Loops
    Video https://vimeo.com/245466297
    Length is 5 minutes
  4. For Loops (Enumerate)
    Video https://vimeo.com/245477015
    Length is 6 minutes
  5. For Loops (Break and Continue)
    Video https://vimeo.com/245478016
    Length is 9 minutes
  6. While Loops
    Video https://vimeo.com/245545155
    Length is 5 minutes
  7. Loops Miscellaneous
    Video https://vimeo.com/245552604
    Length is 6 minutes

Lesson 4: Dictionaries, Exceptions, and Regular Expressions

  1. Dictionaries
    Video https://vimeo.com/246157566
    Length is 6 minutes
  2. Dictionaries Methods
    Video https://vimeo.com/246163031
    Length is 7 minutes
  3. Sets
    Video https://vimeo.com/246167477
    Length is 9 minutes
  4. Exceptions
    Video https://vimeo.com/246174686
    Length is 15 minutes
  5. Regular Expressions (Part1)
    Video https://vimeo.com/246184715
    Length is 15 minutes
  6. Regular Expressions (Part2)
    Video https://vimeo.com/246532117
    Length is 7 minutes
  7. Regular Expressions (Part3)
    Video https://vimeo.com/246534450
    Length is 8 minutes
  8. Regular Expressions, Other Methods
    Video https://vimeo.com/246535038
    Length is 4 minutes

Lesson 5: Functions and the Python Debugger

  1. Functions (Part1)
    Video link https://vimeo.com/247570174
    Length is 8 minute
  2. Functions (Part2)
    Video link https://vimeo.com/247581011
    Length is 11 minutes
  3. Misc Topics (Part1)
    Video link https://vimeo.com/247582360
    Length is 10 minutes
  4. Misc Topics (Part2)
    Video link https://vimeo.com/247655574
    Length is 8 minutes
  5. Python Debugger (pdb)
    Video link https://vimeo.com/247724017
    Length is 10 minutes

Lesson 6: Netmiko

  1. Netmiko Introduction and Basics 
    Video link https://vimeo.com/254569911
    Length is 8 minutes
  2. Netmiko Show Commands
    Video link https://vimeo.com/254578980
    Length is 13 minutes
  3. Netmiko and Prompting
    Video link https://vimeo.com/254587832
    Length is 12 minutes
  4. Netmiko and TextFSM
    Video link https://vimeo.com/254611876
    Length is 10 minutes
  5. Netmiko Config Changes
    Video link https://vimeo.com/254614073
    Length is 8 minutes
  6. Netmiko Troubleshooting
    Video link https://vimeo.com/254786724
    Length is 9 minutes

Lesson 7: Jinja2, YAML and JSON

  1. Jinja2 Basics
    Video link https://vimeo.com/257997257
    Length is 7 minutes
  2. Jinja2 For-Loops and Conditionals
    Video link https://vimeo.com/257999160
    Length is 9 minute
  3. Jinja2 and CSV
    Video link https://vimeo.com/258142987
    Length is 5 minutes
  4. Jinja2 Dictionaries and Nested Loops
    Video link https://vimeo.com/258145504
    Length is 11 minutes
  5. YAML Basics
    Video link https://vimeo.com/258161182
    Length is 9 minutes
  6. YAML Part2
    Video link https://vimeo.com/258169427
    Length is 10 minutes
  7. Using Python to Write YAML
    Video link https://vimeo.com/258171559
    Length is 3 minutes
  8. JSON
    Video link https://vimeo.com/258178243
    Length is 5 minutes
  9. Managing Data Structures
    Video link https://vimeo.com/258181273
    Length is 5 minutes

Lesson 8: Libraries, PIP, and Virtual Environments

  1. Importing Libraries
    Video link https://vimeo.com/259422351
    Length is 5 minutes
  2. sys.path and PYTHONPATH
    Video link https://vimeo.com/259423316
    Length is 7 minutes
  3. pip
    Video link https://vimeo.com/259424573
    Length is 7 minutes
  4. Virtual Environments
    Video link https://vimeo.com/259426537
    Length is 6 minutes
  5. Creating a Simple Python Module
    Video link https://vimeo.com/259427586
    Length is 4 minutes

Quickie: PXE 0xC0000001 Error in SCCM

When you’re imaging/PXE-booting in SCCM, I think the “0xC0000001” error is one of the strangest errors to troubleshoot, because the source of the error is related to some problem/conflict between TFTP and the network adapter of the machine you’re imaging — but then sometimes it has to do with the network adapter of your distribution point.

Windows Boot Manager Error 0xC0000001

I have encountered multiple solutions to this problem, and here are some of them from other blogs:

There are others.

However for me, I had the following scenario, and my solution turned out to be quite simple.

Context:

  • Trying to image Pentium-based, 4 GB HP ProBook x360 11 G1 EE laptops
  • From a VMWare DP, the machines receive the boot image just fine.
  • From a Hyper-V DP, ‘0xC0000001’ error occurs on these laptops.
    • For the sake of curiosity, I did the three items above (change reg key, changed network adapter properties, and even reinstalled WDS). None of these worked.
    • I reverted all those settings and put the DP back in a ‘vanilla’ state

I found this behavior to be really odd. Why would it download the boot image on one just fine, but not on the other? Perhaps the boot image needs network adapter?

Well, it turns out the solution for this model laptop was to add the network adapter driver* to the boot image. We generally don’t add network drivers to boot images unless necessary, which in this case it turned out it was.

And that was that. If you don’t know how to add drivers to the boot image, I’m not going to reinvent the wheel, but I will direct you to this website that has a decent how-to.

Happy SCCM-ing!

(Edit 20180710 – clarified the use of a driver)

(Edit 20190702 – Added Windows Updates as a potential cause).