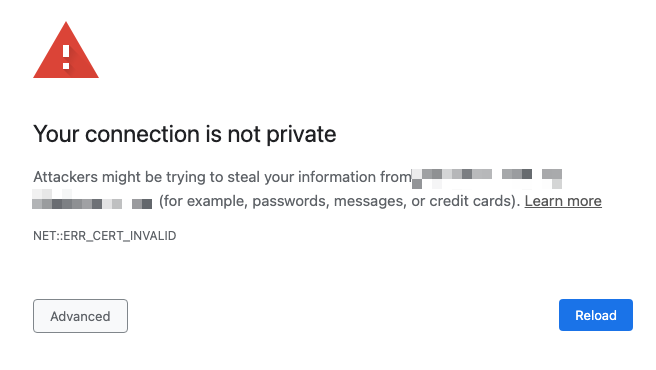
You know what I don’t like? Cottage cheese. It’s gross.
You know what else I don’t like?
This:
And this:
And this:
And this:
And yes, I just wasted a full page, maybe made you excessively scroll, made the readability scores upset, and I’m still not getting to my damn point.
My damn point: I don’t like managed devices that don’t have their web certificates updated, and I had Gigamon appliances that needed some certificate love so I’m jotting down here how to update the Gigamon certificates with externally generated ones.
“Why?” I hear you asking. Well, I don’t think Gigamon does a very good job explaining in their documentation how to update the certificates, so I’m going to do it here.
Googling Gigamon 3rd-Party Certificate Installation
If you try googling for any combination of the words “gigamon install web certificate”, you’re going to get a whole list of links that are not applicable to Gigamon appliances, and really are focused on the management platform GigaVue-FM.
Quick note: the documentation here for GigaVue-FM and the web certificate is accurate, but it’s at the bottom of the search results. So if you’re looking for GigaVue-FM documentation, there you go.
The reason you’re not finding anything related in the search results is because everything related to certificates and the web interface under the crypto commands (much like Cisco). The basic process then is to import the certificate, private key, certificate chain (root and issuing) using the crypto commands, then tell the web service to use the new certificate.
Configuring Gigamon Certificates
First off, for importing third-party certificates you can do it two ways: paste in the certificate/key information, or download it (“fetch”) from somewhere else.
# Copying in the content
(config) # crypto certificate name steveBruleCA public-cert pem "<contents of cert>"
# Downloading/Fetching the CA certificate
(config) # crypto certificate name steveBruleCA public-cert pem fetch http://consentfactory.com/steveBruleCA.crt
Quick Python Server
My preference is to spin up Python http server and download from that location real quick. Assuming you have Python installed, you can run the following:
# Spins up Python with default setting
python3 -m http.server
Which results in this:
Serving HTTP on 0.0.0.0 port 8000 (http://0.0.0.0:8000/) ...
Or run this:
# Spins up Python on default port 80, but you may need to run with elevated privileges since its a privileged port
python3 -m http.server 80
Which results in this:
Serving HTTP on 0.0.0.0 port 80 (http://0.0.0.0:80/) ...
First: Install You Certificate Authority Certificates
You may or may not need to do this. For me, I did. I’ll show both ways to do it, but from here out, I’ll just be fetching from my Python server.
# Copying in the content
(config) # crypto certificate name steveBruleCA public-cert pem "

> -----BEGIN CERTIFICATE-----

> MIIFVzCCAz+gAwIBAgINAgPlk28xsBNJiGuiFzANBgkqhkiG9w0BAQwFADBHMQsw

> CQYDVQQGEwJVUzEiMCAGA1UEChMZR29vZ2xlIFRydXN0IFNlcnZpY2VzIExMQzEU

> MBIGA1UEAxMLR1RTIFJvb3QgUjEwHhcNMTYwNjIyMDAwMDAwWhcNMzYwNjIyMDAw

> MDAwWjBHMQswCQYDVQQGEwJVUzEiMCAGA1UEChMZR29vZ2xlIFRydXN0IFNlcnZp

> Y2VzIExMQzEUMBIGA1UEAxMLR1RTIFJvb3QgUjEwggIiMA0GCSqGSIb3DQEBAQUA

> A4ICDwAwggIKAoICAQC2EQKLHuOhd5s73L+UPreVp0A8of2C+X0yBoJx9vaMf/vo

> 27xqLpeXo4xL+Sv2sfnOhB2x+cWX3u+58qPpvBKJXqeqUqv4IyfLpLGcY9vXmX7w

> Cl7raKb0xlpHDU0QM+NOsROjyBhsS+z8CZDfnWQpJSMHobTSPS5g4M/SCYe7zUjw

> TcLCeoiKu7rPWRnWr4+wB7CeMfGCwcDfLqZtbBkOtdh+JhpFAz2weaSUKK0Pfybl

> qAj+lug8aJRT7oM6iCsVlgmy4HqMLnXWnOunVmSPlk9orj2XwoSPwLxAwAtcvfaH

> szVsrBhQf4TgTM2S0yDpM7xSma8ytSmzJSq0SPly4cpk9+aCEI3oncKKiPo4Zor8

> Y/kB+Xj9e1x3+naH+uzfsQ55lVe0vSbv1gHR6xYKu44LtcXFilWr06zqkUspzBmk

> MiVOKvFlRNACzqrOSbTqn3yDsEB750Orp2yjj32JgfpMpf/VjsPOS+C12LOORc92

> wO1AK/1TD7Cn1TsNsYqiA94xrcx36m97PtbfkSIS5r762DL8EGMUUXLeXdYWk70p

> aDPvOmbsB4om3xPXV2V4J95eSRQAogB/mqghtqmxlbCluQ0WEdrHbEg8QOB+DVrN

> VjzRlwW5y0vtOUucxD/SVRNuJLDWcfr0wbrM7Rv1/oFB2ACYPTrIrnqYNxgFlQID

> AQABo0IwQDAOBgNVHQ8BAf8EBAMCAYYwDwYDVR0TAQH/BAUwAwEB/zAdBgNVHQ4E

> FgQU5K8rJnEaK0gnhS9SZizv8IkTcT4wDQYJKoZIhvcNAQEMBQADggIBAJ+qQibb

> C5u+/x6Wki4+omVKapi6Ist9wTrYggoGxval3sBOh2Z5ofmmWJyq+bXmYOfg6LEe

> QkEzCzc9zolwFcq1JKjPa7XSQCGYzyI0zzvFIoTgxQ6KfF2I5DUkzps+GlQebtuy

> h6f88/qBVRRiClmpIgUxPoLW7ttXNLwzldMXG+gnoot7TiYaelpkttGsN/H9oPM4

> 7HLwEXWdyzRSjeZ2axfG34arJ45JK3VmgRAhpuo+9K4l/3wV3s6MJT/KYnAK9y8J

> ZgfIPxz88NtFMN9iiMG1D53Dn0reWVlHxYciNuaCp+0KueIHoI17eko8cdLiA6Ef

> MgfdG+RCzgwARWGAtQsgWSl4vflVy2PFPEz0tv/bal8xa5meLMFrUKTX5hgUvYU/

> Z6tGn6D/Qqc6f1zLXbBwHSs09dR2CQzreExZBfMzQsNhFRAbd03OIozUhfJFfbdT

> 6u9AWpQKXCBfTkBdYiJ23//OYb2MI3jSNwLgjt7RETeJ9r/tSQdirpLsQBqvFAnZ

> 0E6yove+7u7Y/9waLd64NnHi/Hm3lCXRSHNboTXns5lndcEZOitHTtNCjv0xyBZm

> 2tIMPNuzjsmhDYAPexZ3FL//2wmUspO8IFgV6dtxQ/PeEMMA3KgqlbbC1j+Qa3bb

> bP6MvPJwNQzcmRk13NfIRmPVNnGuV/u3gm3c

> -----END CERTIFICATE-----
"
If you type in the quote, hit enter, you’ll be given a prompt to enter the data for the certificate, which you end with another quote, then enter.
For fetching the certificate, it’s straightforward:
# Downloading/Fetching the CA certificate
(config) # crypto certificate name steveBruleCA public-cert pem http://consentfactory.com/steveBruleCA.crt
Now after getting the certificate on the appliance, you need to put them in the trusted store like this:
(config) # crypto certificate ca-list default-ca-list name steveBruleCA
The CA certificate will be trusted now.
Second: Install the Certificate for the Web Service
Now we’re cookin’. Let’s download and install for the web service.
(config) # crypto certificate name webServiceCert public-cert pem fetch http://consentfactory.com/webServiceCert.crt
That’s it for the certificate.
Third: Install the Private Key
This will install the key and prompt you for the password for the private key:
(config) # crypto certificate name webServiceCert private-key pem fetch http://consentfactory.com/webServiceCert.key
Now we’re set to enable the web service to use the new certificate.
Fourth: Configure Web Service to Use New Certificate
This is the easy part:
web https certificate name webServiceCert
That it! No need to restart any services, as the appliance appears to take care of all of that on the backend.
You’re all done. Time to smile, look in the mirror, notice and ignore the zit, and maybe go look at some PCAPs.


