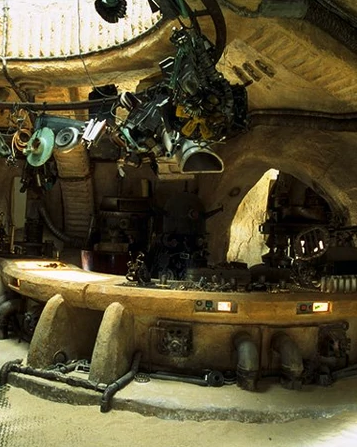
Since COVID-19 hit, I moved out to my garage so I could work from home, and in doing so I realized how loud my network rack really is. My rack is not the prettiest rack, and to be frank I’ve never really been a fan of the sleek LED lit home lab. My aesthetic is more like something from a Tatooine droid shop: not disorganized, per se, but certainly not pretty.
I’ve really been wanting a Juniper switch for home, so I went shopping on ebay to see if I could find anything, and surprisingly, right now you can find EX2200 switches for really cheap — like, $75 shipped. I wondered then if I could modify the fans on the switch, and lo and behold, you can! So I bought a Juniper PoE switch, but the next part was purchasing the fans.
I came across the video below from Christian Scholz showing mostly how to replace the fans. It’s an excellent video, and shows you how to replace the two back chassis fans.
However, it doesn’t show you how to replace the fans for the power supply, largely because the power supply on non-PoE EX2200s doesn’t have fans (see YouTube preview above).
For the fans on a PoE EX2200, there’s actually just one fan, and if you want to replace it with a Noctua fan, it’s going to work, but it’s going to get a bit warm. One solution is to add a fan on the exhaust port that draws the air out, but it’s going to require a little modification for the chassis cover.
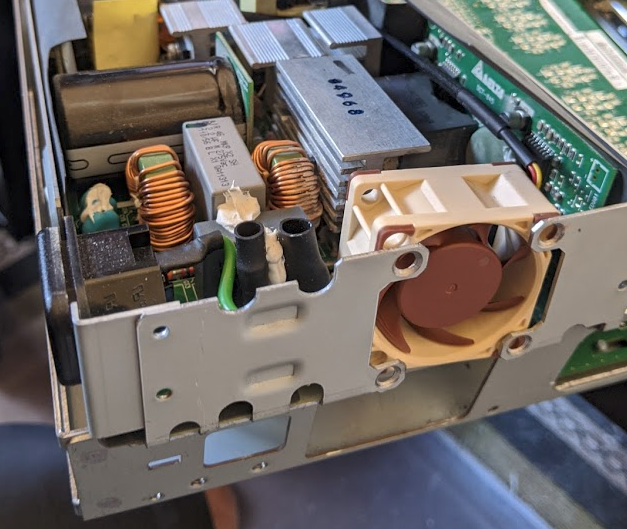
I’m going to briefly show what I did, but I didn’t think to take pictures during the process, but here’s a shot of what it looks like overall:
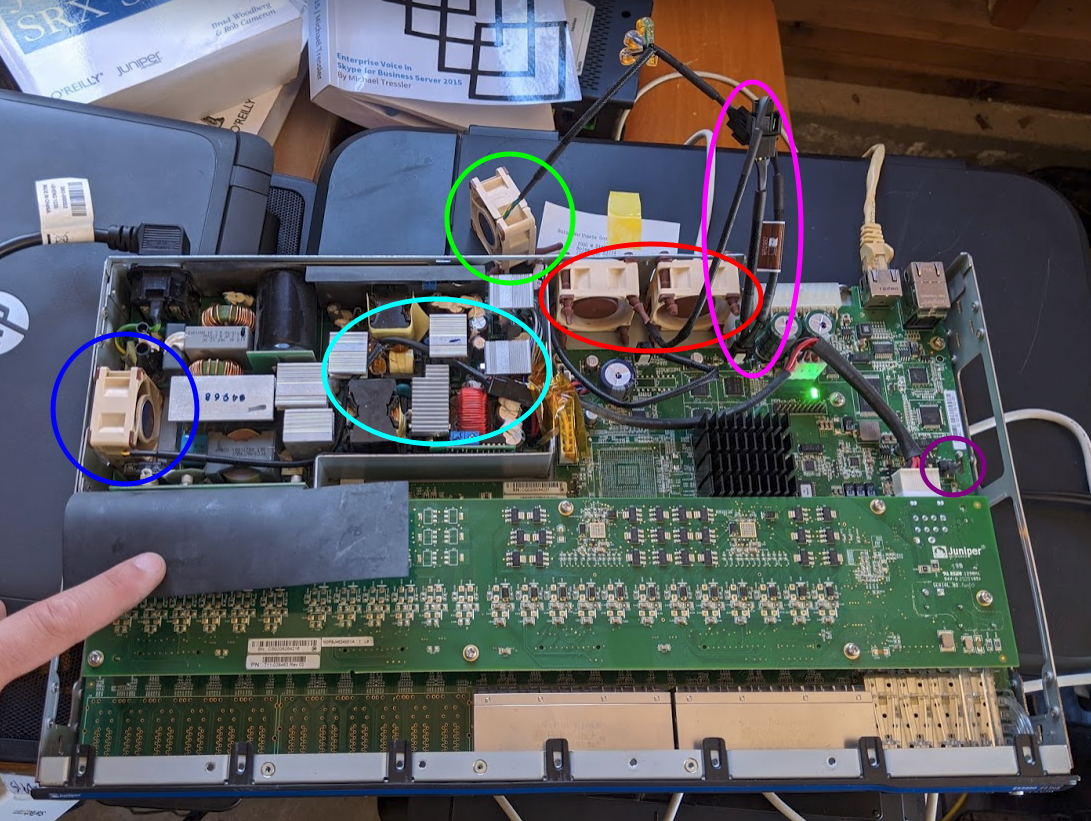
Backstory: I actually screwed up and got the wrong Noctua fan for the power supply fan. I thought it was a PWM for some reason, but it actually needed a FLX fan. However, I was able to still use the PWM fan. Here’s a breakdown of the above:
- Blue – This is the power supply fan, a Noctua NF-A4x20 FLX fan.
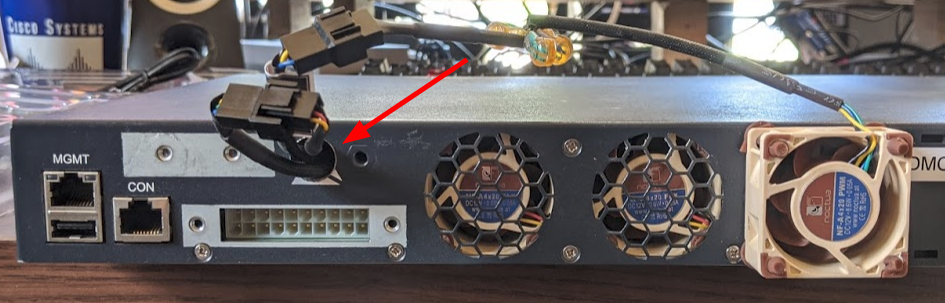
- Teal – This is a splice of the old cable adapter with the new using the Noctua omnijoin adapter set that comes with the fans (which is stupidly easy to use). Red and black wires matched up, and then I matched the yellow on the Noctua cable to the blue on the old fan plug.
- Green – This is the Noctua NF-A4x20 PWM fan that mistakenly bought. The fan runs at 100% all the time, but not an issue. While a mistake, the fan came with…
- Pink – Y-Adapter set that came with the PWM fan. I was able to plug this into the power plug port for the right FLX rear chassis fan (red), then plug that fan into the main y-adapter and then the PWM into the other port.
- Red – These are FLX fans.
- Purple – This was a port labeled “J9” that tried to use for power, but didn’t work (hence why I used the y-adapter).
Some notes I learned. For one, you’ll need to lift the power supply up in order to unscrew the screws:
I also had to drill a fairly large hole in the chassis cover so that I could fit the the cable in (see below). Had I not screwed up and spliced the PWM cable, the hole could have been smaller and I probably could have fit the y-adapter within the chassis.
I had to also modify the chassis for the PoE exhaust port by flattening the metal screen (so the attached fan didn’t rub against it) and I had to drill two additional holes so that the silicon screws could hold the fan down.
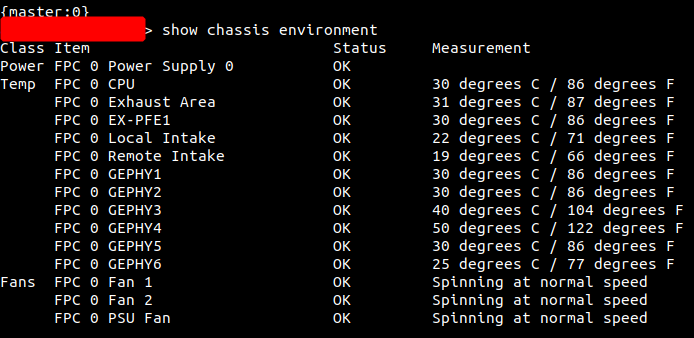
Finally, here’s a look from the CLI side:
Final Thoughts
- Overall, it’s working really well. It’s almost completely quiet — my EVE-NG server is actually louder than this thing.
- It’s not pretty, but the ugliness is hidden in the back.
- I DO NOT RECOMMEND YOU DO THIS TO PRODUCTION EQUIPMENT. I’m doing this to my home stuff, so I can live with it and the consequences, but I would never do this at work (too much work, TBH; better to buy an EX2300-C).
- Screwing the chassis cover back on will indeed be a little tighter, but with a little force you can get all the screws on.
- I don’t recommend using a drill to unscrew these (you can strip the screws pretty easily), but if you do, have a firm downward motion and screw/unscrew in bursts.
- I used to loathe the EX2200s for how slow they are, but on the 12.3R12.4 software, they seem to work well.